
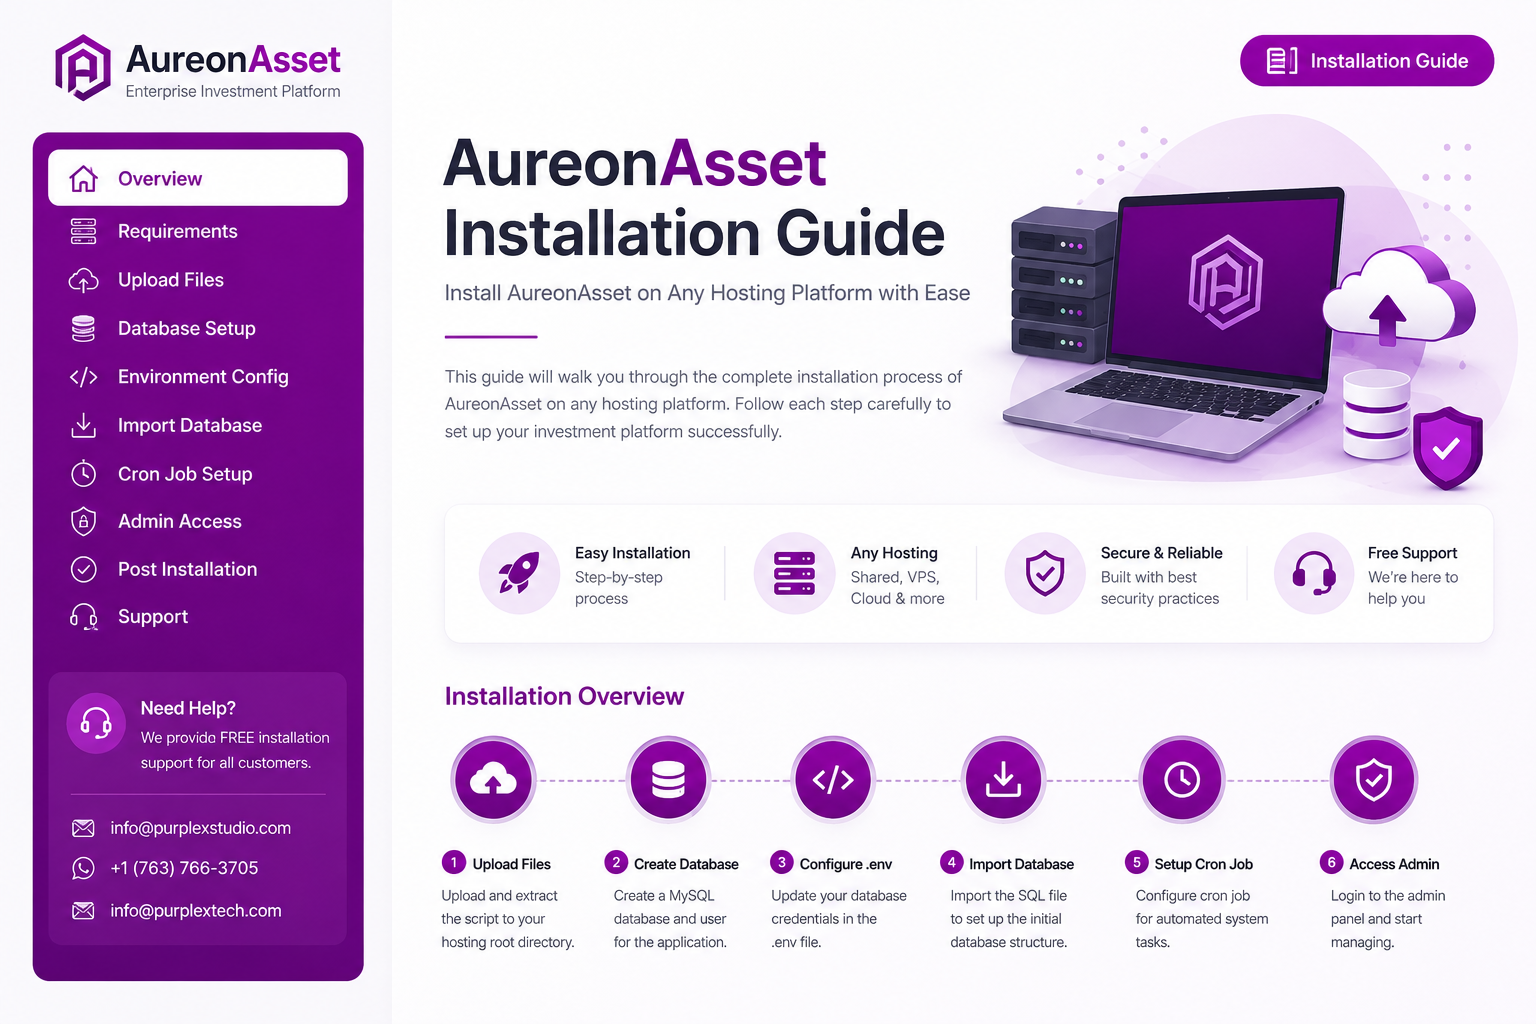
Install AureonAsset on Any Hosting Platform with Ease Learn how to install and configure AureonAsset on Shared Hosting, VPS, Dedicated Servers, and cloud platforms with this step-by-step guide. Follow the complete installation process, including file upload, environment configuration, database import, cron setup, and admin access, using easy-to-follow instructions, screenshots, and video tutorial
AureonAsset Script Installation Guide
Welcome to the AureonAsset Script Installation Guide.
Before You Begin
If you've landed on this documentation through a search engine, a shared link, or another source and haven't yet purchased AureonAsset, you can learn more about the product, explore its features, view screenshots, and purchase the latest version from the official product page.
👉 Purchase AureonAsset:
https://purplexstudio.com/products/aureonasset-script-enterprise-investment-platform-solution-58543
Purchasing through the official product page ensures you receive the latest release, future updates, documentation, and access to free customer support from the PurplexStudio team.
Note: This documentation is intended for licensed AureonAsset customers. If you haven't obtained your copy yet, please visit the official product page above to get started.
This guide walks you through the complete installation process for AureonAsset, whether you're deploying on Shared Hosting, VPS, Dedicated Servers, Cloud Servers (AWS, Google Cloud, Azure, DigitalOcean, Linode, Vultr, Hetzner), or Local Development Environments.
Although this guide demonstrates the installation using a Shared Hosting (cPanel) environment, the same installation principles apply to every hosting provider.
Video Tutorial: (Embed your installation video here)
Table of Contents
Server Requirements
Supported Hosting Providers
Uploading the Script
Extracting the Installation Files
Creating a Database
Configuring the Environment File
Importing the Database
Opening Your Website
Administrator Login
Setting Up the Cron Job
Post-Installation Recommendations
Getting Support
1. Server Requirements
Before installing AureonAsset, ensure your hosting environment meets the following minimum requirements.
Table of contents [Show]
Requirements
PHP 8.3 or higher
Laravel Framework 11.x
MySQL 8+ or MariaDB
Composer Support (recommended)
HTTPS/SSL Certificate
cURL Enabled
OpenSSL
PDO Extension
Mbstring Extension
Tokenizer
XML Extension
Fileinfo Extension
BCMath Extension
ZIP Extension
JSON Extension
It is recommended to always use the latest stable PHP 8.3 release for the best performance and security.
2. Supported Hosting Providers
AureonAsset works perfectly on almost every modern hosting environment, including:
Shared Hosting (cPanel)
VPS Servers
Dedicated Servers
Cloud Servers
AWS EC2
Google Cloud Platform
Microsoft Azure
DigitalOcean
Vultr
Linode
Hetzner
Hostinger VPS
Namecheap Hosting
GoDaddy Hosting
Bluehost
Local Development (Laragon, XAMPP, WAMP)
This guide uses Shared Hosting as the installation example because it is the most common hosting environment.
3. Uploading the Script
Log into your hosting control panel.
Open File Manager.
Navigate to your website's root directory.
Examples include:
public_html
htdocs
www
your domain root folder
Upload the AureonAsset ZIP package to the root directory.
4. Extracting the Installation Files
After the upload completes:
Select the ZIP archive.
Click Extract.
Wait until extraction finishes.
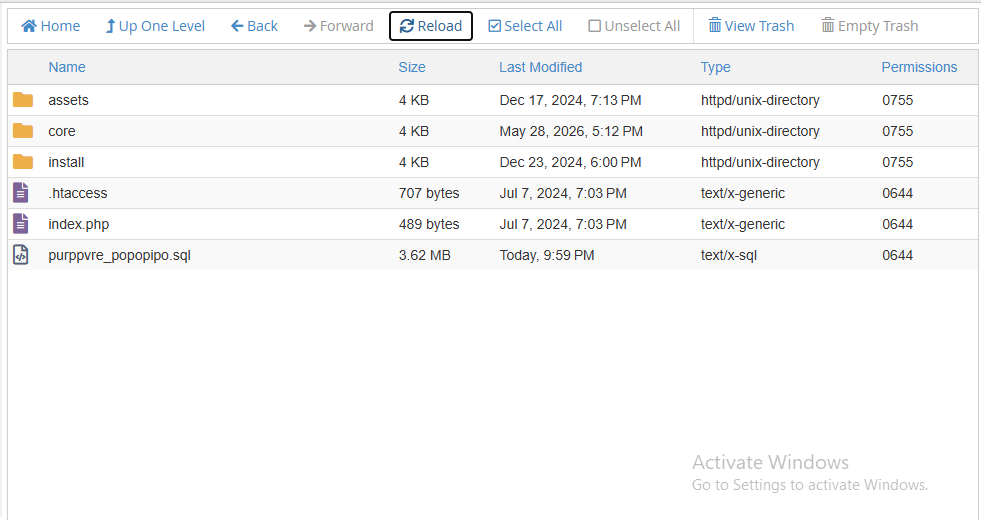
After extraction you should see folders similar to:
core
assets
storage
vendor
and other project files.
5. Creating a MySQL Database
Open your hosting control panel.
Navigate to:
MySQL Databases
Create:
Database
Database User
Database Password
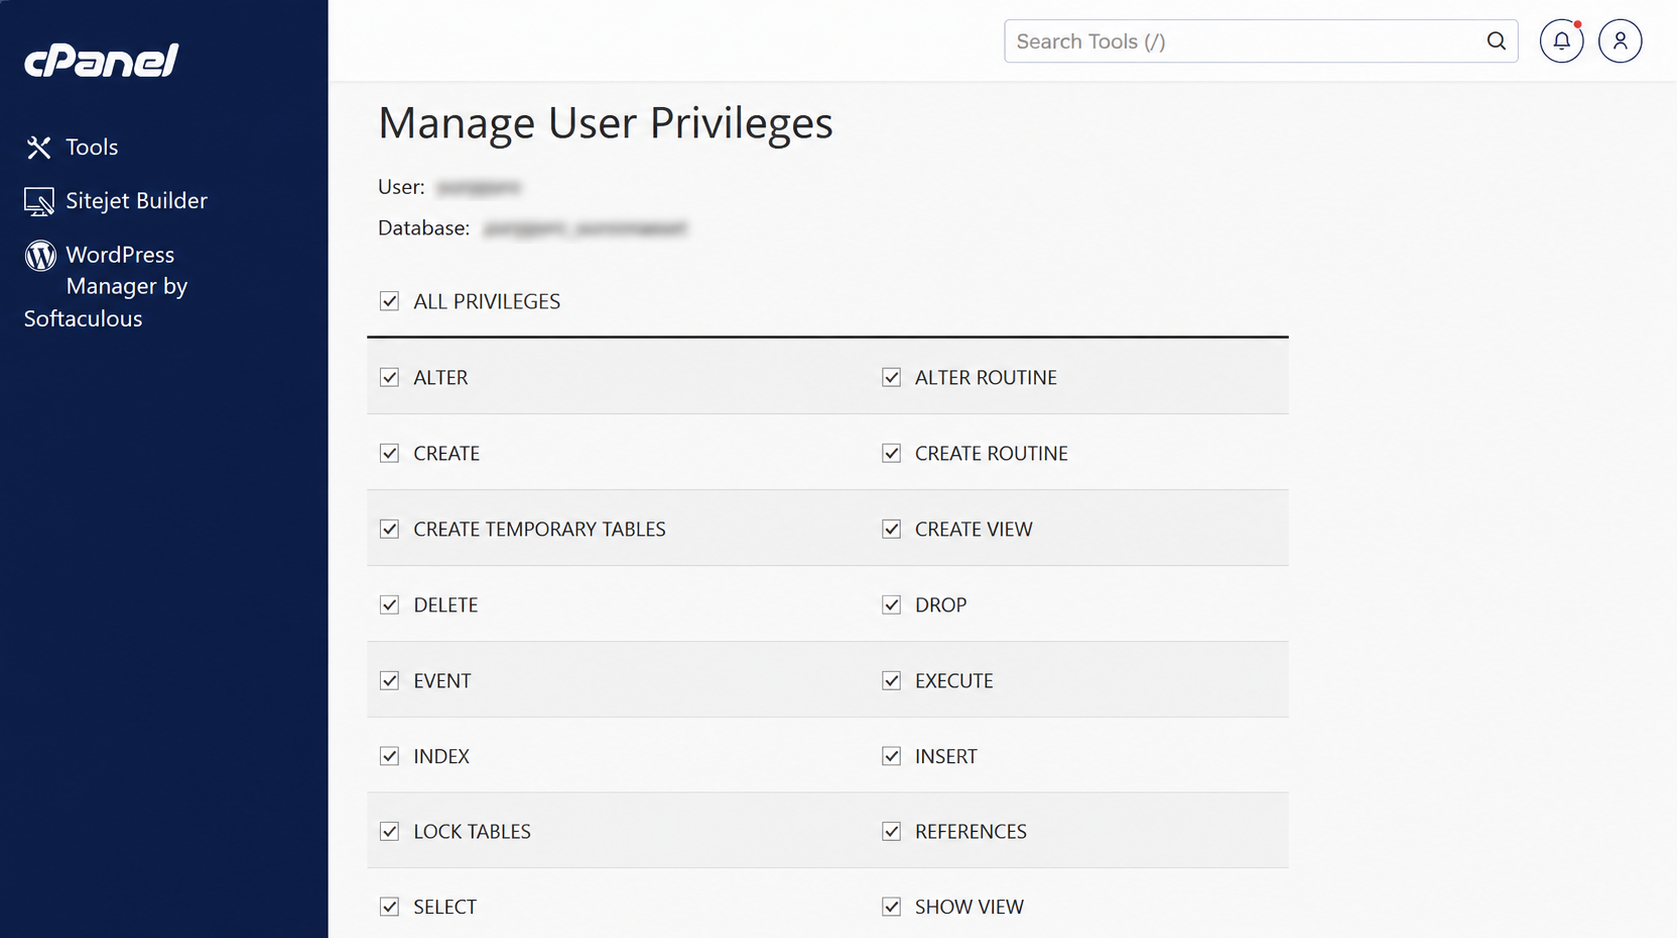
Assign the user to the database.
Grant ALL PRIVILEGES.
Save the following information because it will be required later.
Database Name
Database Username
Database Password
Database Host (usually localhost)
6. Configuring the Environment File
Inside your project, open:
core/vendor/psr/log/.env
Locate the following database configuration.
DB_CONNECTION=mysql
DB_HOST=localhost
DB_PORT=3306
DB_DATABASE=database_name
DB_USERNAME=database_username
DB_PASSWORD=database_password
Replace the placeholder values with your own database credentials.
Example:
DB_CONNECTION=mysql
DB_HOST=localhost
DB_PORT=3306
DB_DATABASE=mydatabase
DB_USERNAME=myuser
DB_PASSWORD=mypassword
Save the file.

7. Importing the Database
Return to your hosting control panel.
Open:
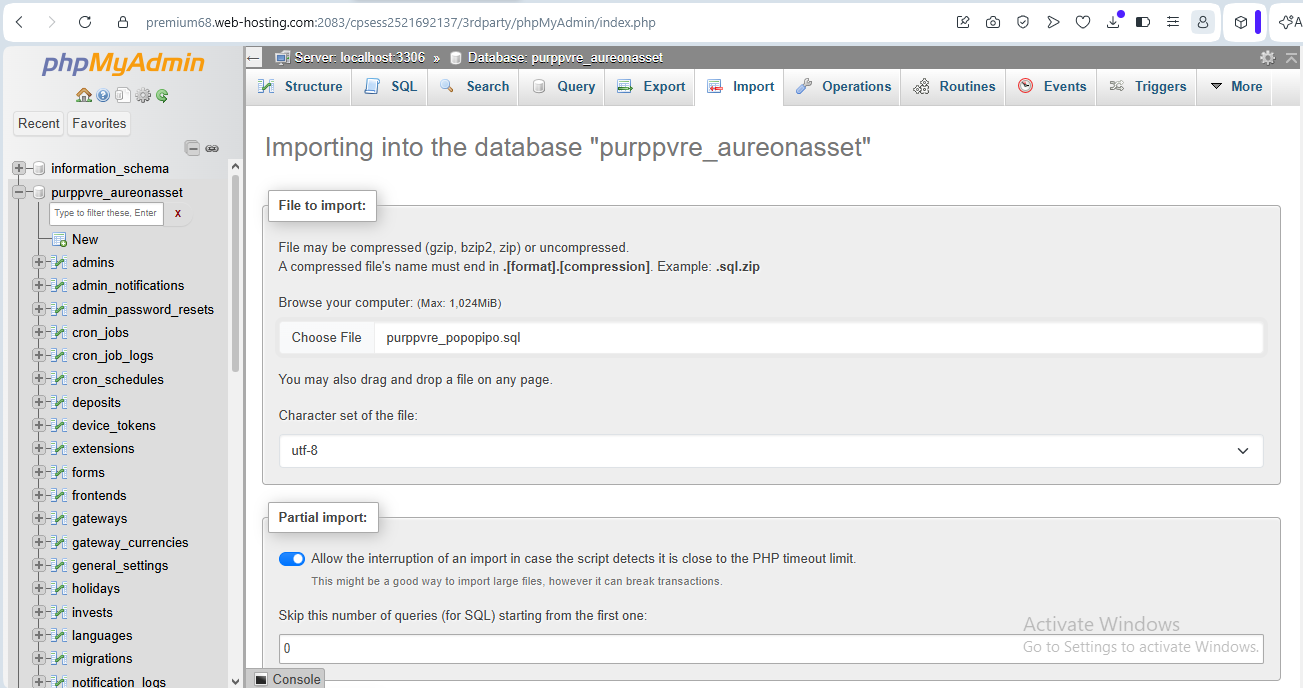
phpMyAdmin
Locate the database you created earlier.
Click Import.
Inside the root directory of the AureonAsset package, locate the SQL file:
purppvre_aureonasset.sql
Select the SQL file.
Click Import.
Wait until phpMyAdmin reports:
Import completed successfully.
8. Opening Your Website
Once installation has been completed, open your website using your browser.
Example:
https://yourdomain.com
If all steps were completed correctly, the AureonAsset homepage should load successfully.
9. Administrator Login
To access the administration dashboard, visit:
https://yourdomain.com/admin
Default Administrator Credentials
Username
purplextech
Password
admin
Important: Immediately change the administrator password after your first login for security purposes.
10. Setting Up the Cron Job
AureonAsset requires a scheduled Cron Job to automate background tasks such as investment processing, scheduled operations, notifications, payouts, and other system maintenance.
Open:
Cron Jobs
Create a new Cron Job.
Schedule:
Every Minute (* * * * *)
Command:
curl -s https://yourdomain.com/cron
Replace:
yourdomain.com
with your actual website URL.
Example:
curl -s https://example.com/cron
Save the Cron Job.
Screenshot: (Show cPanel Cron Job configuration.)
11. Post-Installation Recommendations
After installation, we recommend the following:
Change the administrator password.
Enable SSL (HTTPS).
Remove unnecessary installation archives.
Keep regular database backups.
Configure email settings.
Test deposits and withdrawals.
Configure payment gateways.
Review all system settings before going live.
These recommendations help improve both the security and reliability of your installation.
12. Need Help?
We are committed to providing free installation assistance if you encounter any issues while installing AureonAsset.
+1 (763) 766-3705
Whether your installation is on Shared Hosting, VPS, Dedicated Server, or any Cloud Platform, our support team is always happy to assist you.
Congratulations!
Your AureonAsset installation is now complete.
Thank you for choosing AureonAsset.
We sincerely appreciate your trust in our products and look forward to supporting your investment platform as it grows.